In this blog we published several Raspberry projects implementing security surveillance systems with camera and alarm, as well as other projects that improve the security of your devices, if you still do not know what it is about, please check out the following links.
After not really understanding what was going on with my tapo camera and its privacy settings, I decided to not depend only on the default settings of the app and instead applied an extra which is also implemented with Hassio system.
The concepts in this manual could, with a little imagination, be replicated in other systems such as Alexa, Google, or Siri – thanks to their routines and scenes. But from home we have experimented with Home assistant because it is both Open Source and focused on privacy (it doesn’t connect to the internet if you don’t want it to) and it also has a large catalogue of functions.
The idea is to put an NFC TAG by the exit of your house, and every time you go out or come back home, you will be able to activate or deactivate this Tapo privacy method – simply by placing your phone near the TAG. That action will force the camera to rotate its lens in the direction of the wall, preventing you from seeing anything even if the privacy method is deactivated by any chance.
Here’s a GIF which summarises the scene:
Also, if you keep reading until the last paragraph of this article, I will give you some tips on how to make it even safer than what you see in the video.
The prerequisites you must have in order to follow this article are:
I will continue to explain the configurations that you must follow in the suggested order to get the same configuration you saw in the GIF.
Read the tag in the Hassio app
Go to App > Settings > Tags > Add new tag > Name > Create and write
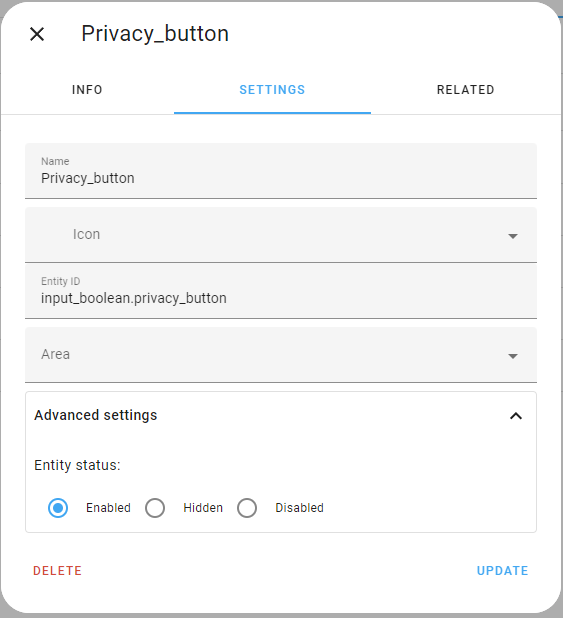
Create a Helper within Hassio
We will use this as a virtual button within Hassio, to know if the privacy mode is switched on or off, and also to be able to monitor when it is being used.
For the moment, other actions will activate this virtual button. For them, let’s name the button.
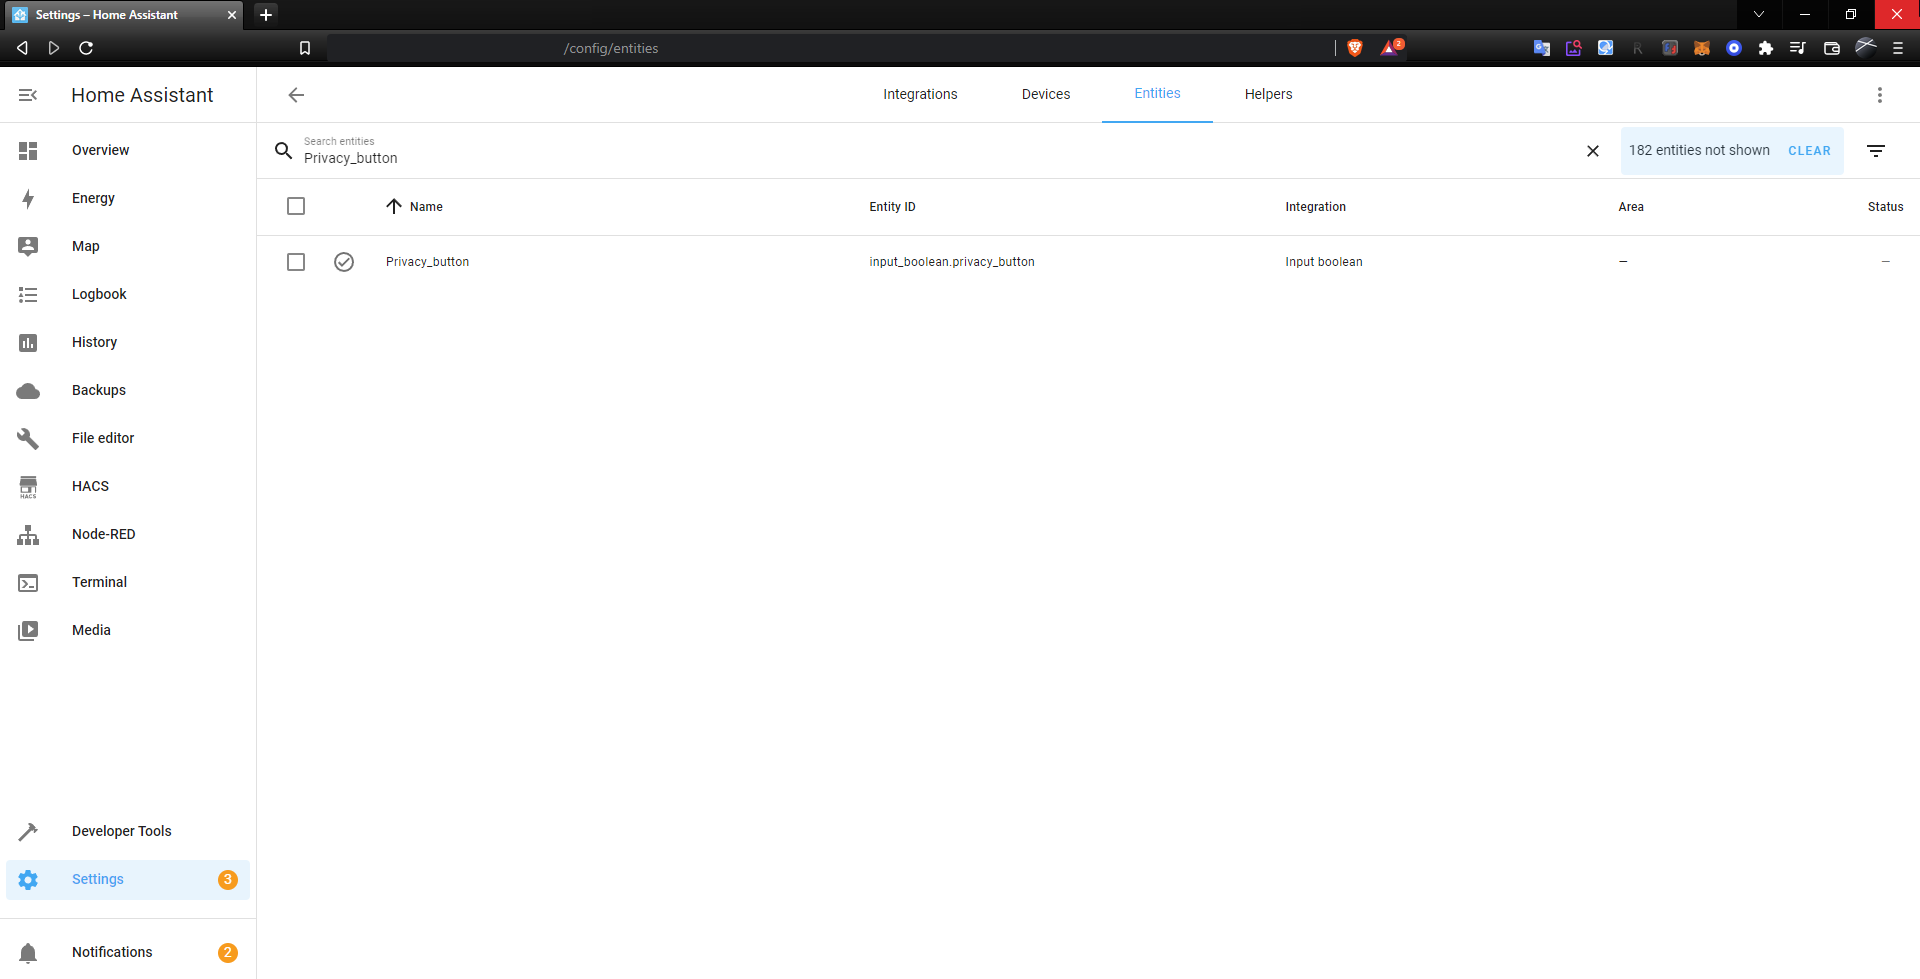
If you go to “Entities” you will see that your button also appears there, as an Hassio entity.
Create Start / End Privacy Mode Automations
1) Automation / Start Privacy Cam
Perhaps this is the most difficult part, but it’s where the programming of this system starts, it’s very simple and visual programming, but as I said earlier, I will give you some tips to improve the security level at the end of the article. Follow the path:
Settings > Automations & Scenes > Automations > Create automation > Start with an empty automation
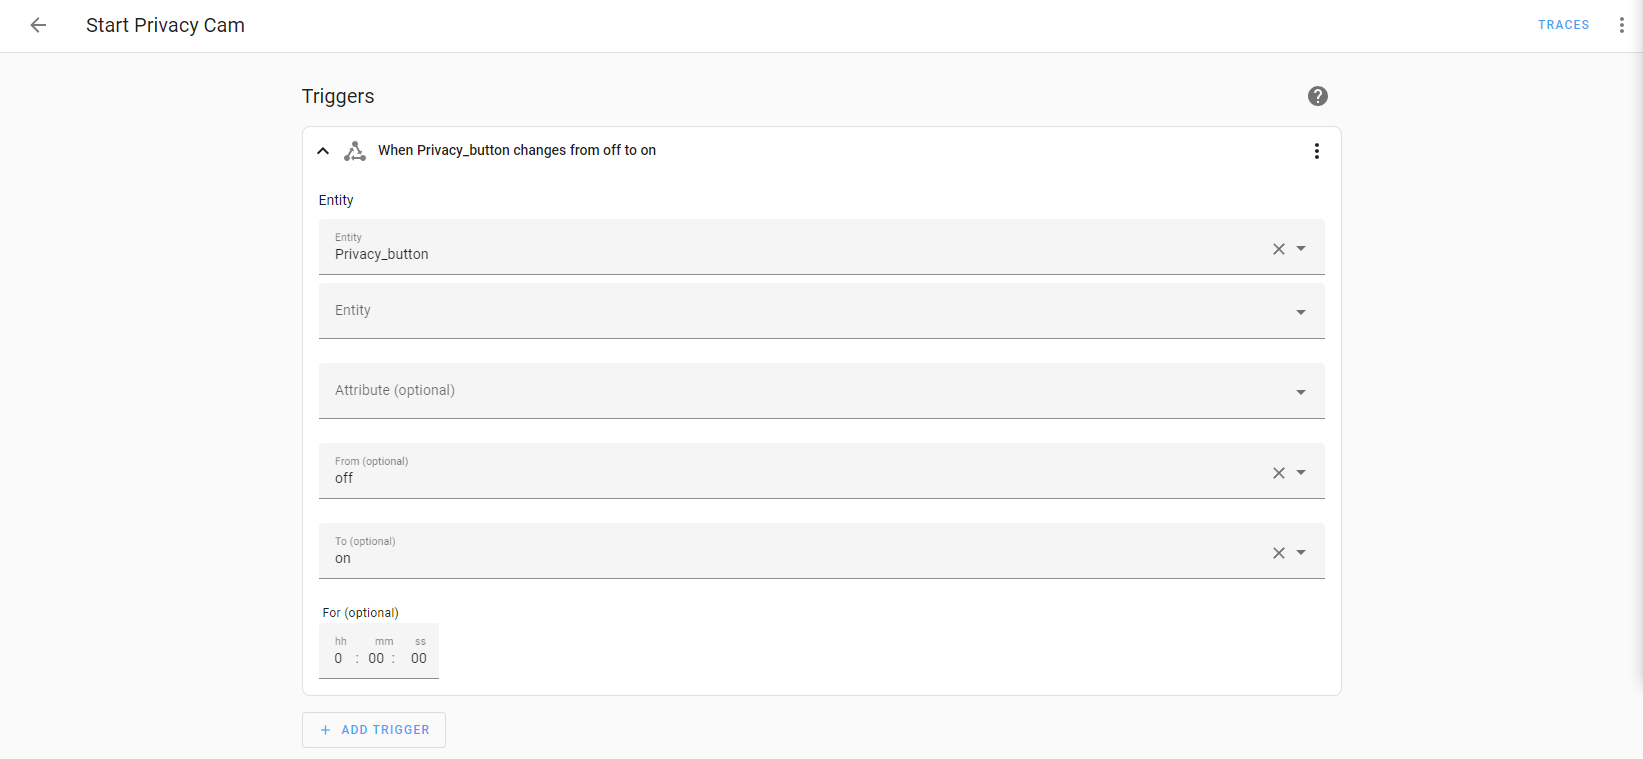
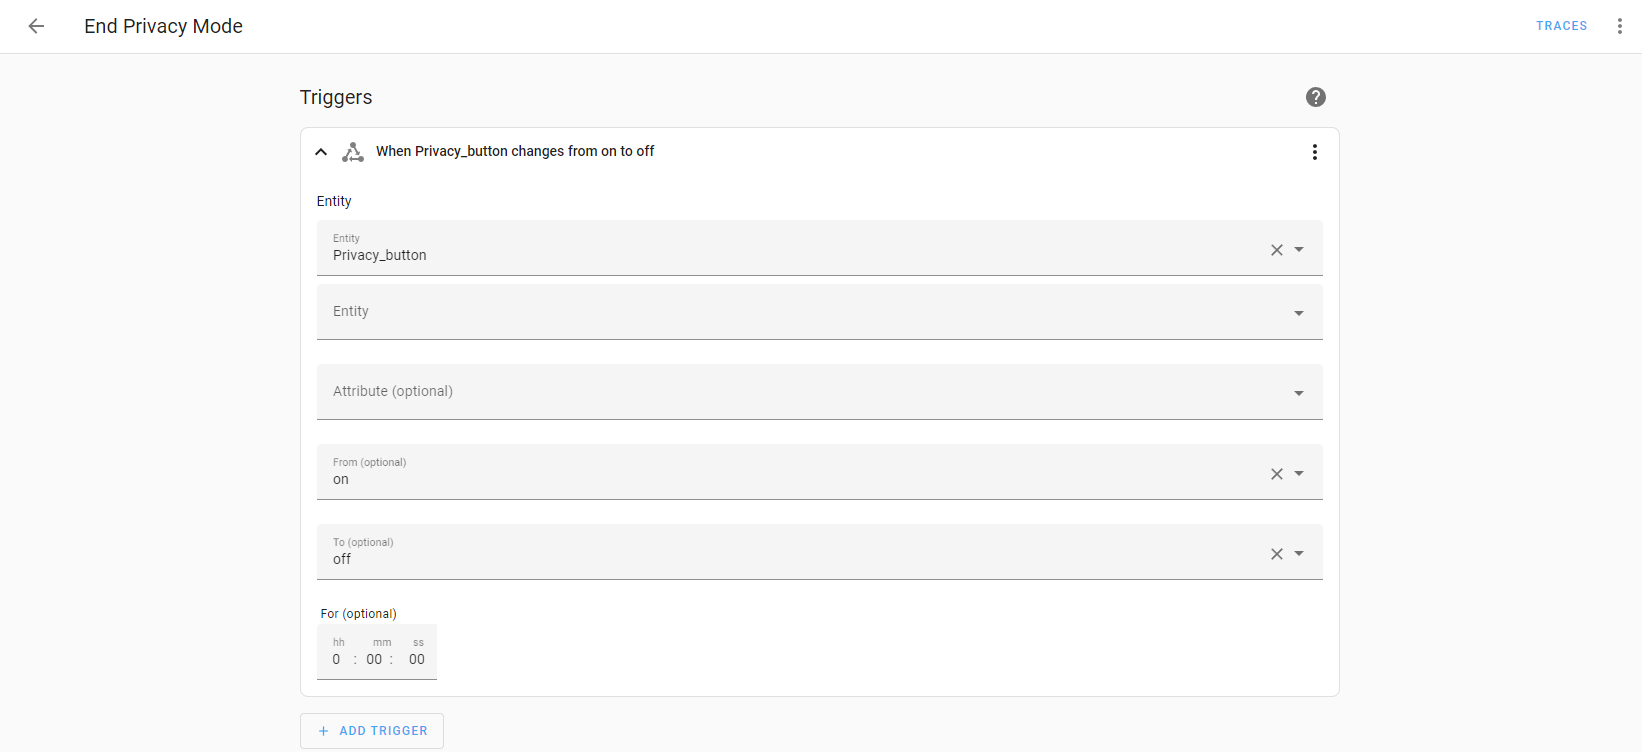
We will name this button Start Privacy Cam and fill in the “Triggers” section, selecting the previously created button and specifying from “off” to “on”, because we are turning on the privacy mode.
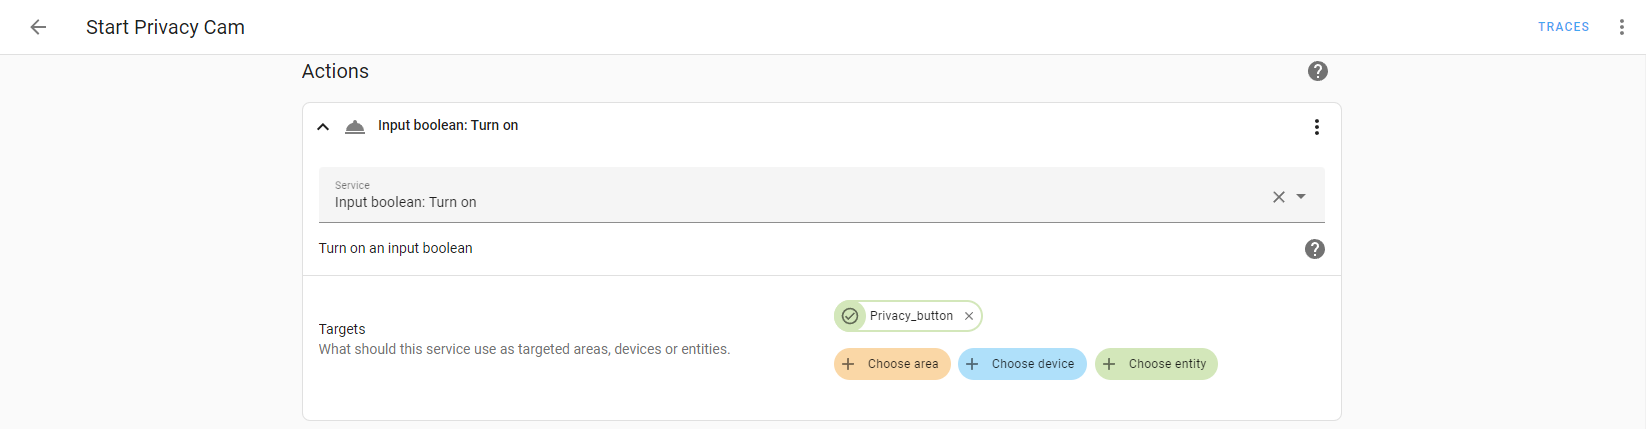
The conditions section will be empty (in this article), and the actions are 3:
Set the Privacy_button created above to ON
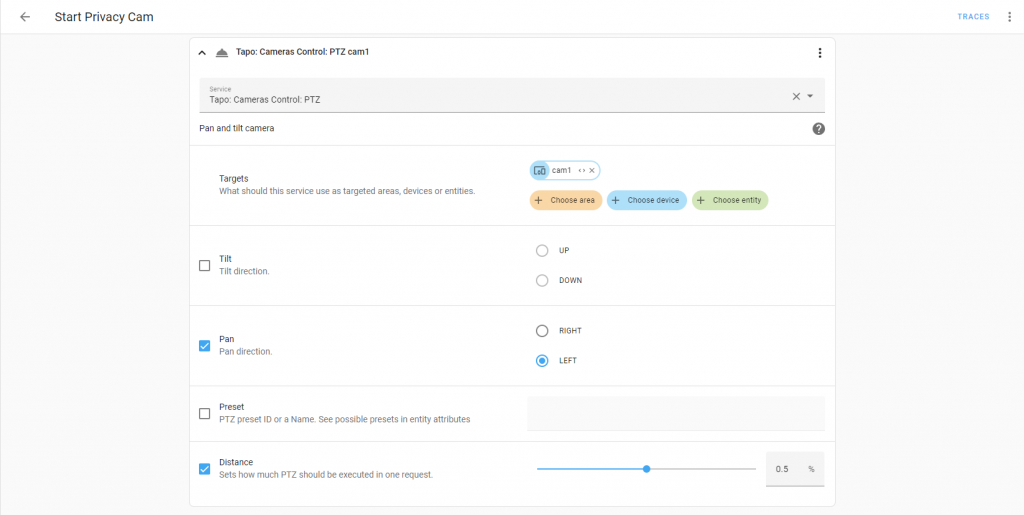
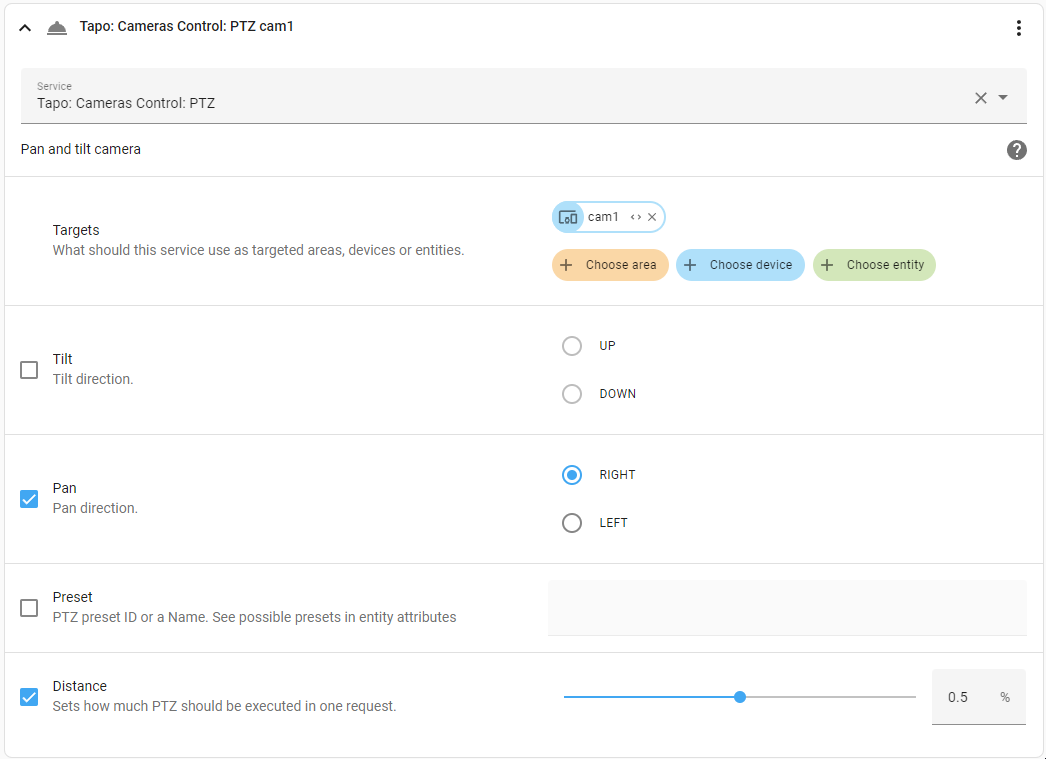
Tapo: Cameras Control: PTZ (Rotate camera 360° horizontally)
In “Targets”, you can add all of the Tapo cameras that you own, not just one.
In this part I recommend that you try to find the perfect distance for your environment, through trial and error. This can vary from case to case.
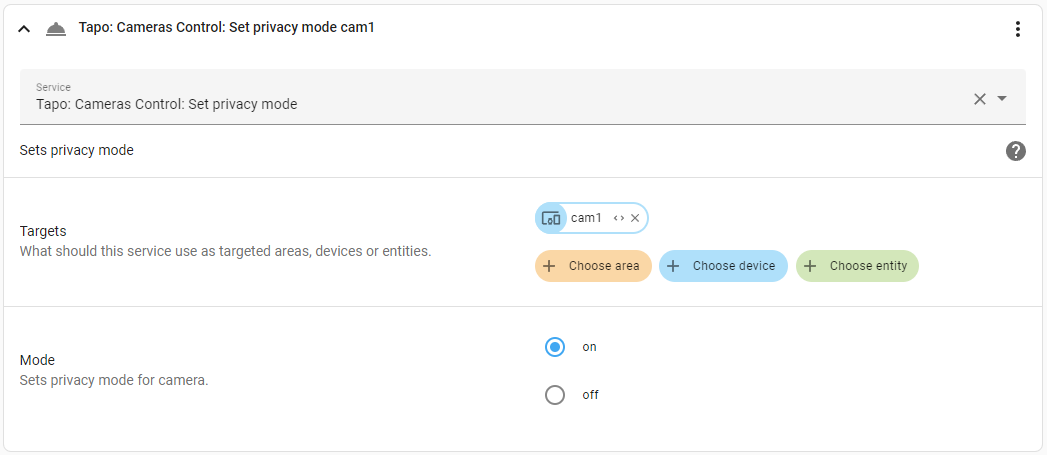
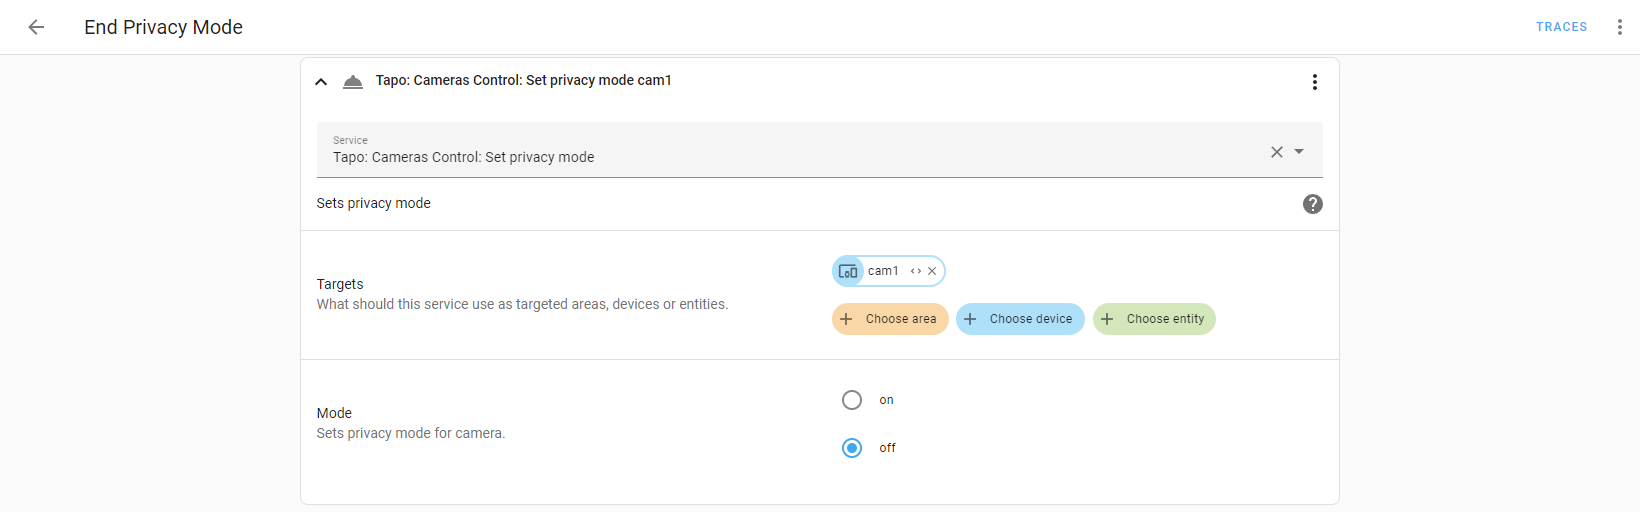
Tapo: Cameras Control: Set privacy mode
For programming lovers I leave you the code of the Start Privacy Mode automation, in case you prefer the code editor to the visual 😈
This configuration would be done in the same way, but performing the opposite action of Start Privacy Cam. Also note that the camera cannot rotate if Tapo’s Privacy Mode is enabled. Therefore, this mode must be deactivated before rotating the camera.
As previously, the final code is attached for comparison 😉
alias: End Privacy Mode
description: ""
trigger:
  - platform: state
    entity_id:
      - input_boolean.privacy_button
    from: "on"
    to: "off"
condition: []
action:
  - service: input_boolean.turn_off
    entity_id: input_boolean.privacy_button
  - service: tapo_control.set_privacy_mode
    data:
      privacy_mode: "off"
    target:
      device_id: dxxxxxxxxxxxxxxxxxxxxxxxxx
  - service: tapo_control.ptz
    data:
      pan: RIGHT
      distance: 0.5
    target:
      device_id: dxxxxxxxxxxxxxxxxxxxxxxxxx
mode: single
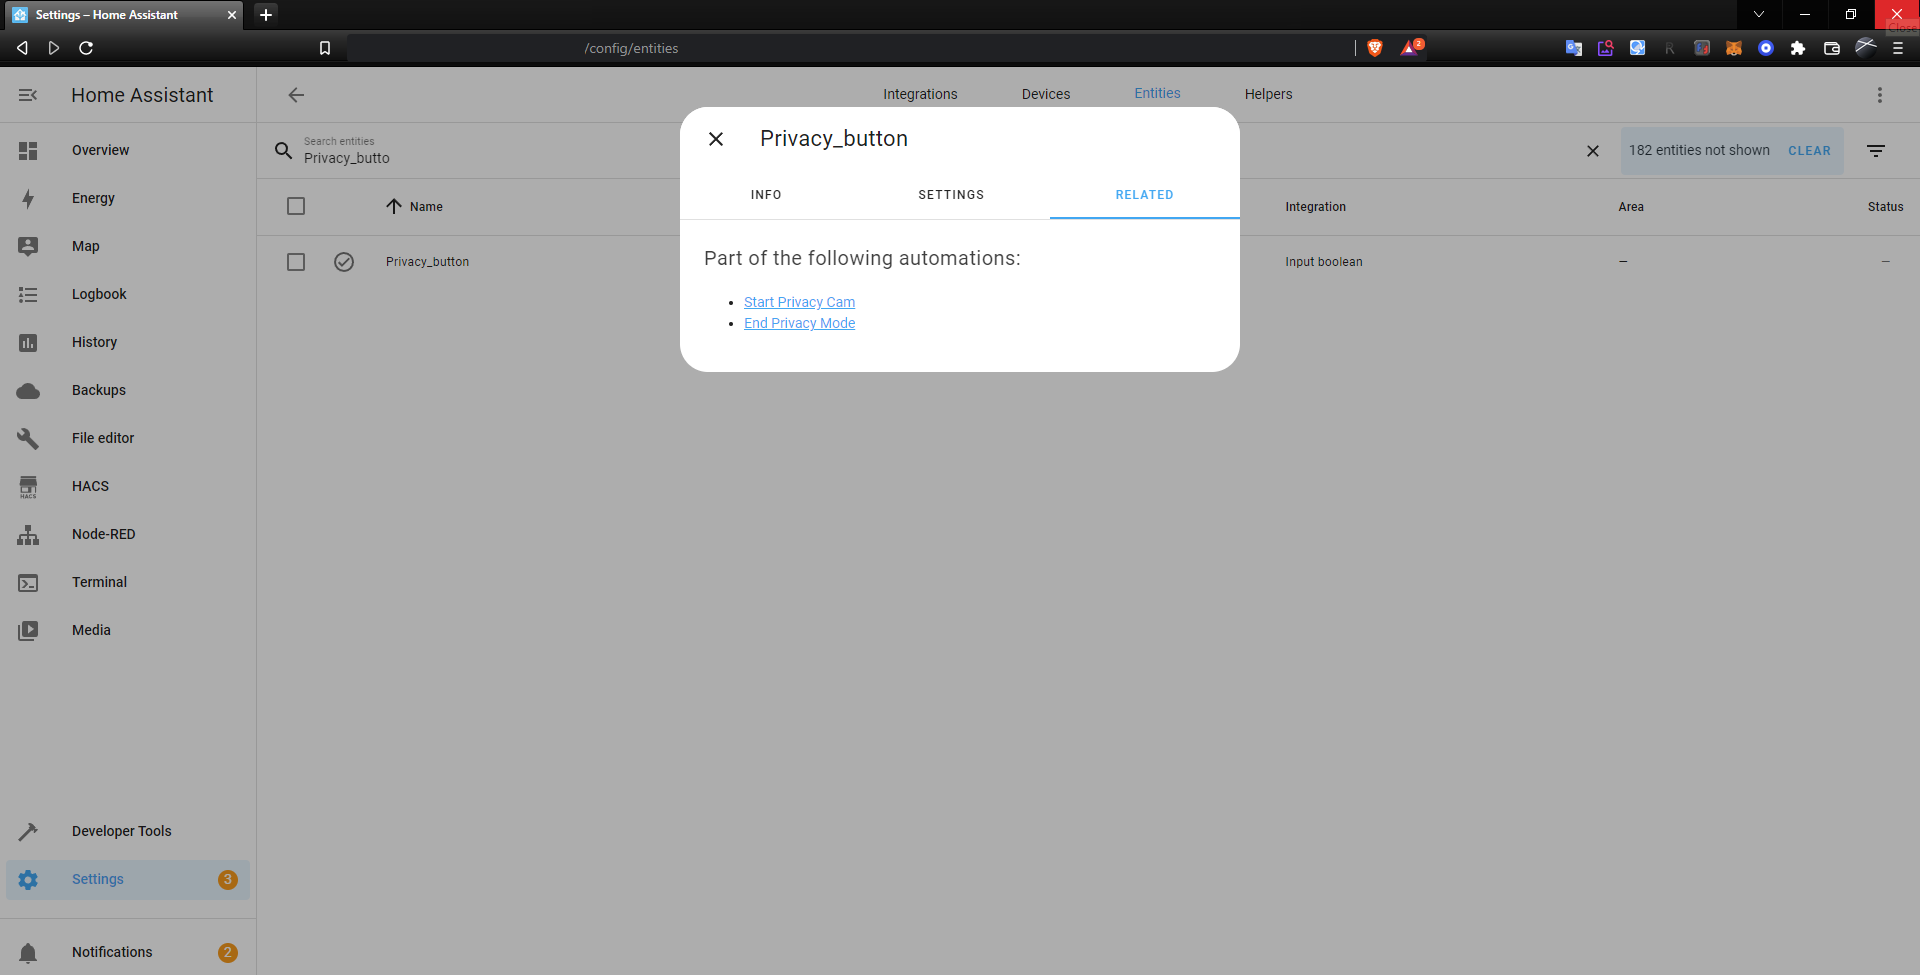
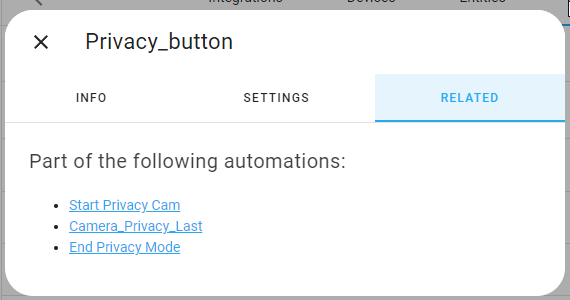
Check previously created entity
Go to review the entity previously created when we made the Helper (Privacy_button), you will see that they have been linked to your automations. If you did everything right you will be able to activate the privacy mode using the button we created at the beginning 😉
To activate it click on Info and then review the results.
If you notice that the performance is correct and it is indeed executing the actions that we programmed, it should look like the first GIF I showed you at the beginning of the article, and then we only have to perform the last step.
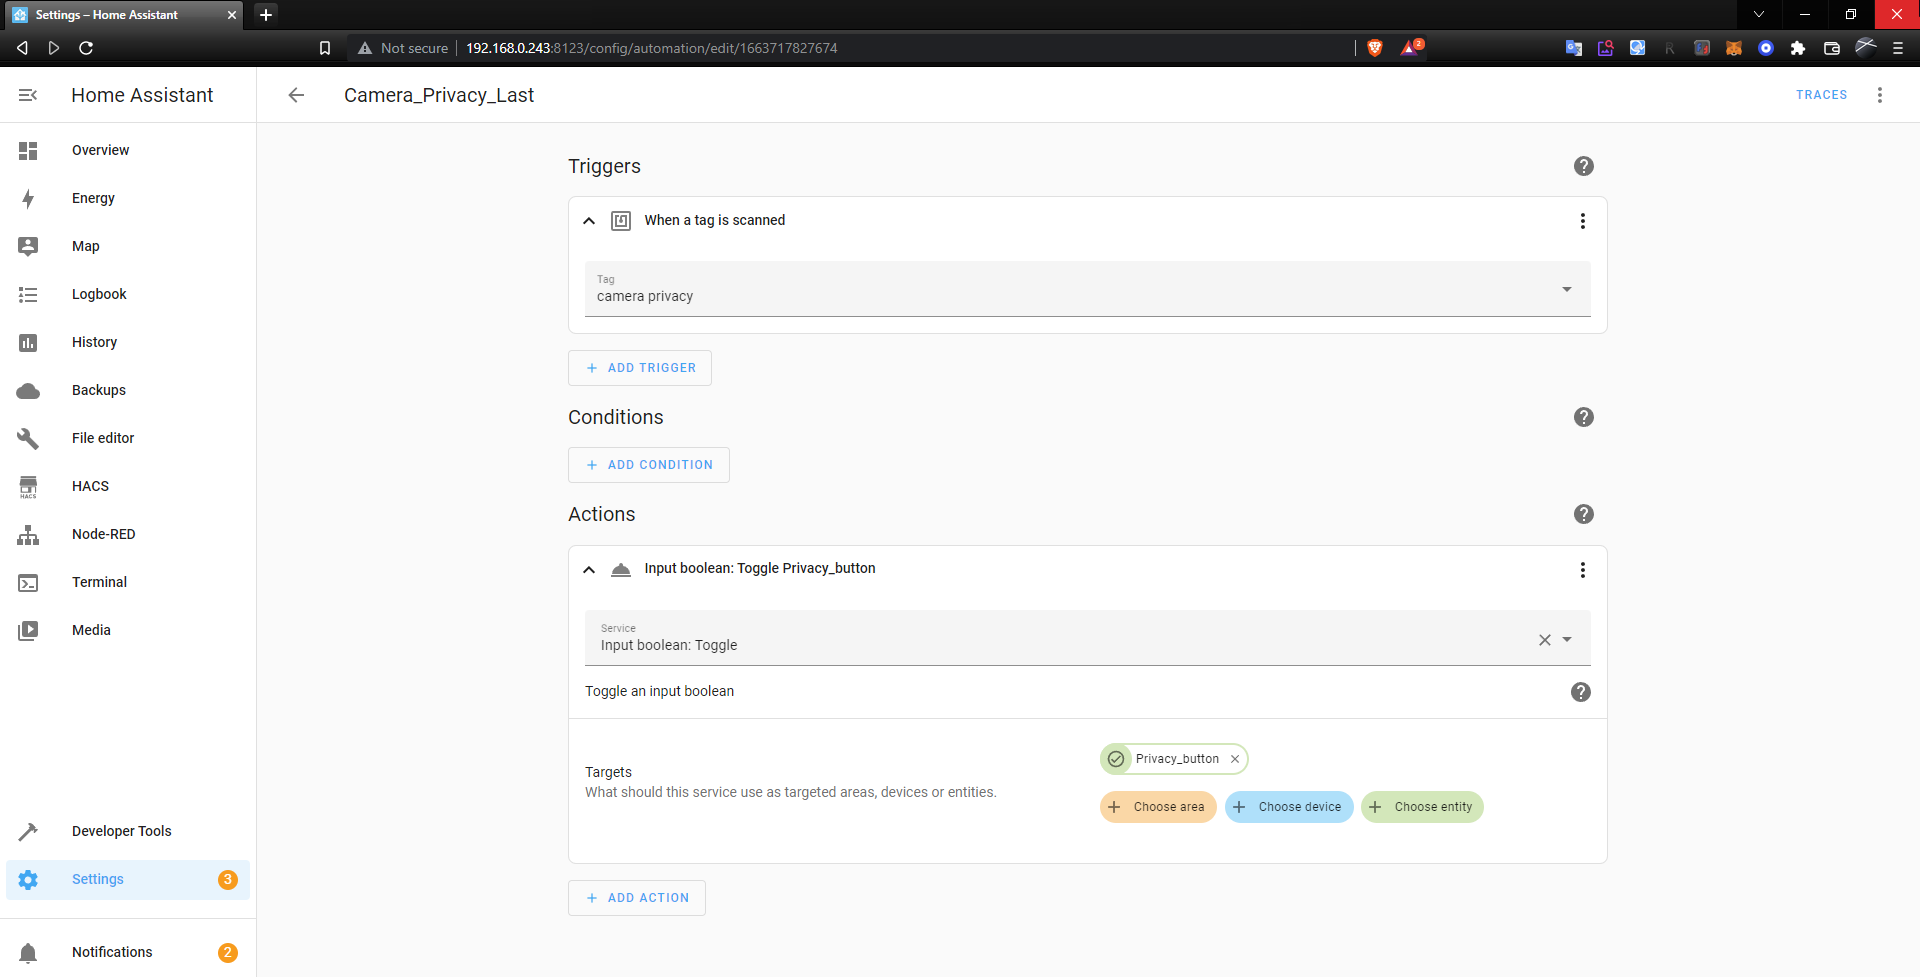
Automation to read the NFC card
In this step, the only thing we are going to do is reference the NFC sticker that we created previously from the mobile app. This will make the button change between ON,OFF,ON,ON,OFF,ON… each time we read the sticker with our mobile phone.
Settings > Automations & Scenes > Automations > Create automation > Start with an empty automation
And we will create our final automation, it’s so simple that we only need a screenshot to summarize it.
You can also check that everything is related by checking the “related” section of the virtual button.
And with this you should have your camera system with extra privacy, but at the beginning of the article, I promised you that if you got to the last paragraph I would give you some really good tips to make your system even more secure!
Honestly, sometimes I noticed that when I use the privacy mode it turns itself off, but the camera didn’t rotate itself off❓. I don’t think anyone is walking around inside there, but at least having the ability to automate the rotation of the camera allows us to be safe in the knowledge that if this mode is deactivated, nothing or nobody is watching us.
The best thing to do is disconnect the camera physically from the electricity supply during your important meetings 😇
The next options I leave you, and if I see interest I will do in other articles, are: apply the camera rotation and then physically turn it off from the electricity. This would protect it even from the Tapo App. You can add in “Start Privacy Mode” a channel with a Telegram Bot 😈, to turn on the camera physically if needed using a 2FA.
A second option would be, if the privacy mode has been deactivated/activated, to send a message to Telegram!
This website uses cookies so that we can provide you with the best user experience possible. Cookie information is stored in your browser and performs functions such as recognising you when you return to our website and helping our team to understand which sections of the website you find most interesting and useful.
Strictly Necessary Cookies
Strictly Necessary Cookie should be enabled at all times so that we can save your preferences for cookie settings.
If you disable this cookie, we will not be able to save your preferences. This means that every time you visit this website you will need to enable or disable cookies again.

Leave a Reply